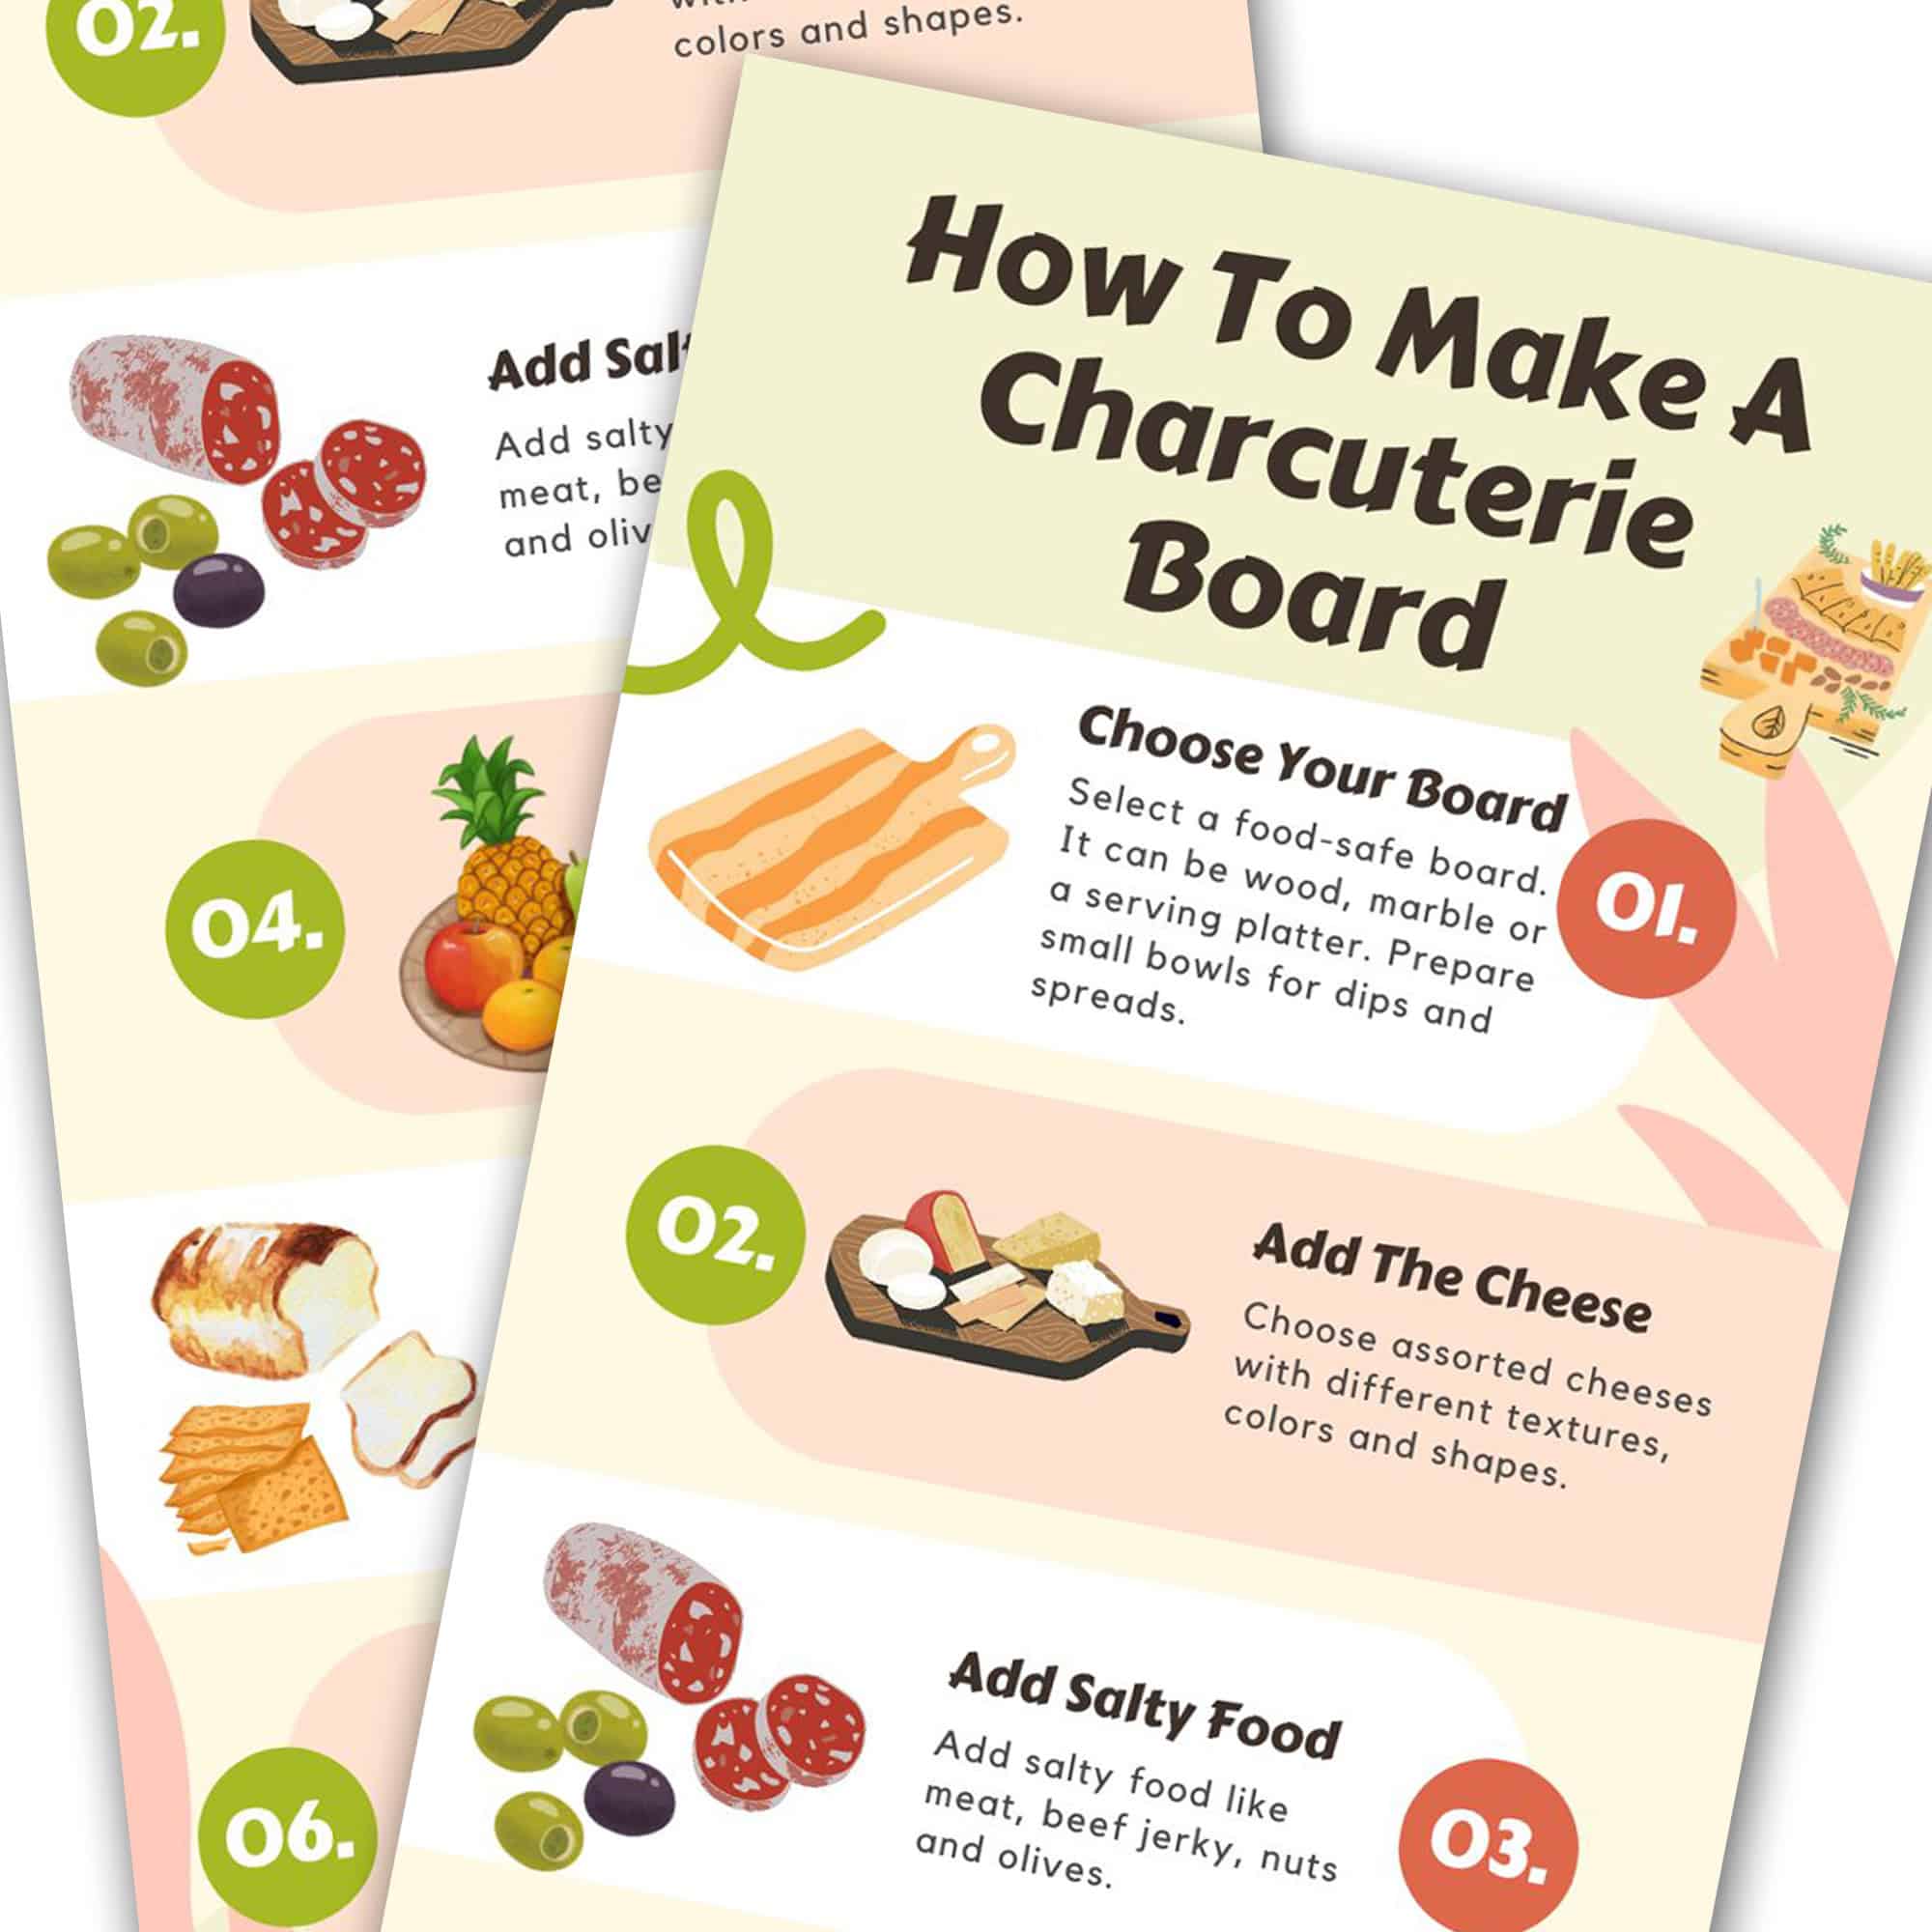
Free Printable Step-By-Step Charcuterie Board Guide
Food boards are all the rage at the moment, and it’s understandable why! A food board turns simple food into a work of art, and trust me, anyone can master it; you don’t need to be a chef, nor an artist and I will teach you all the tricks you need to know!
Whether you’re throwing a party, planning a cozy night in, or just want to snack in style, a charcuterie board, also known as a food board or grazing board, is always a good idea. With a few tasty ingredients and a little arranging, you’ll have a board that looks amazing, tastes even better, and will have everyone thinking you’re the perfect host! I’ve made a gorgeous free printable with a step-by-step guide to help you prepare an easy and quick food board every time!

1. Pick Your Base
Choose a food-safe board, it can be a wooden board, a marble one or a serving platter. There are loads of affordable boards that would make a stunning food board.
2. Choose Your Ingredients
A classic food board typically includes:
- Meats: It can be salami, prosciutto, chorizo, turkey slices or beef jerky.
- Cheeses: Mix 2-4 types of cheeses with different textures and flavors. Some common examples are: soft brie, sharp cheddar, aged gouda, or creamy goat cheese. Cut the cheeses into different shapes, slice some, cut some into cubes and keep some whole.
- Crackers & Bread: Use a combination of bread and crackers to create a board for all. Consider crostini, baguette slices, breadsticks, or artisan crackers.
- Fruits: Add fresh or dried fruit for color and texture. You can use any fruit that you want, common ones are grapes, berries, sliced apples or pears, and dried fruit like apricots or figs.
- Nuts: Adding crunch to your board is next. Choose your favorite nuts like almonds, walnuts, pistachios, or candied pecans for a sweeter option.
- Extras: Fill in the gaps with popular grazing board food like olives and pickles, some even add chocolate.
- Dips & Condiments: Add bright colored and tasty dips to complete your board. They should be served in little bowls or cups.
3. Arrange Your Board
- Start with the Bowls: Place any small bowls for dips, condiments, olives, or other extras first. These anchor your board and help guide the layout.
- Add the Meats: Fold, fan, or roll slices for texture and visual appeal. Arrange them in small groups around the board.
- Place the Cheese: Space cheeses evenly and mix up textures and colors, place soft next to hard, mild next to bold.
- Layer Crackers & Bread: Slightly overlap crackers and bread slices to create depth and keep things tidy.
- Fill with Fruits & Nuts: Use fresh and dried fruit, plus a variety of nuts, to add color and fill in empty spaces.
- Finish with Extras: Tuck in extras like chocolates, herbs, or pickles to add the final touch and make the board feel complete and look fabulous!
4. Pro Tips
- Serve with cheese knives and spreaders.
- Mix textures and colors for visual appeal.
- Serve at room temperature for best flavor.
- Label cheeses for guests!
- Don’t worry about being too precise, imperfection is part of the food board charm.
5. Keep It Seasonal and Personal
Swap ingredients depending on the time of year. Use fresh berries in summer, spiced nuts in fall, or themed picks for holidays. Check out these food board ideas for every occasion!
Download Your Free Food Board Guide!
Grab the free printable Food Board Guide for a visual, easy-to-use chart with a step-by-step guide. It’s perfect to print and keep in your kitchen or use at your next party.
UP NEXT: 30 Stunning Fruit Platter Designs For All Occasions
Sarah xx
- The Ultimate Post-Holiday Party Cleanup Checklist

- Go Wild with the Cutest Safari Party Ideas
- 10 Most Common Party-Planning Mistakes that You Can Easily Avoid

- The Only Party Planning Checklist You’ll Ever Need (Free Download!)

- Delicious Main Course Ideas for the Perfect Christmas Dinner

- Thanksgiving Decoration Ideas You Need To Try